Sharing your collections with students on Wakelet is a straightforward process that promotes collaboration and interaction within your classroom. Whether you're creating a new collection or moving an existing one to a classroom, you can effortlessly share it and define access permissions for your students. Here's how to do it:
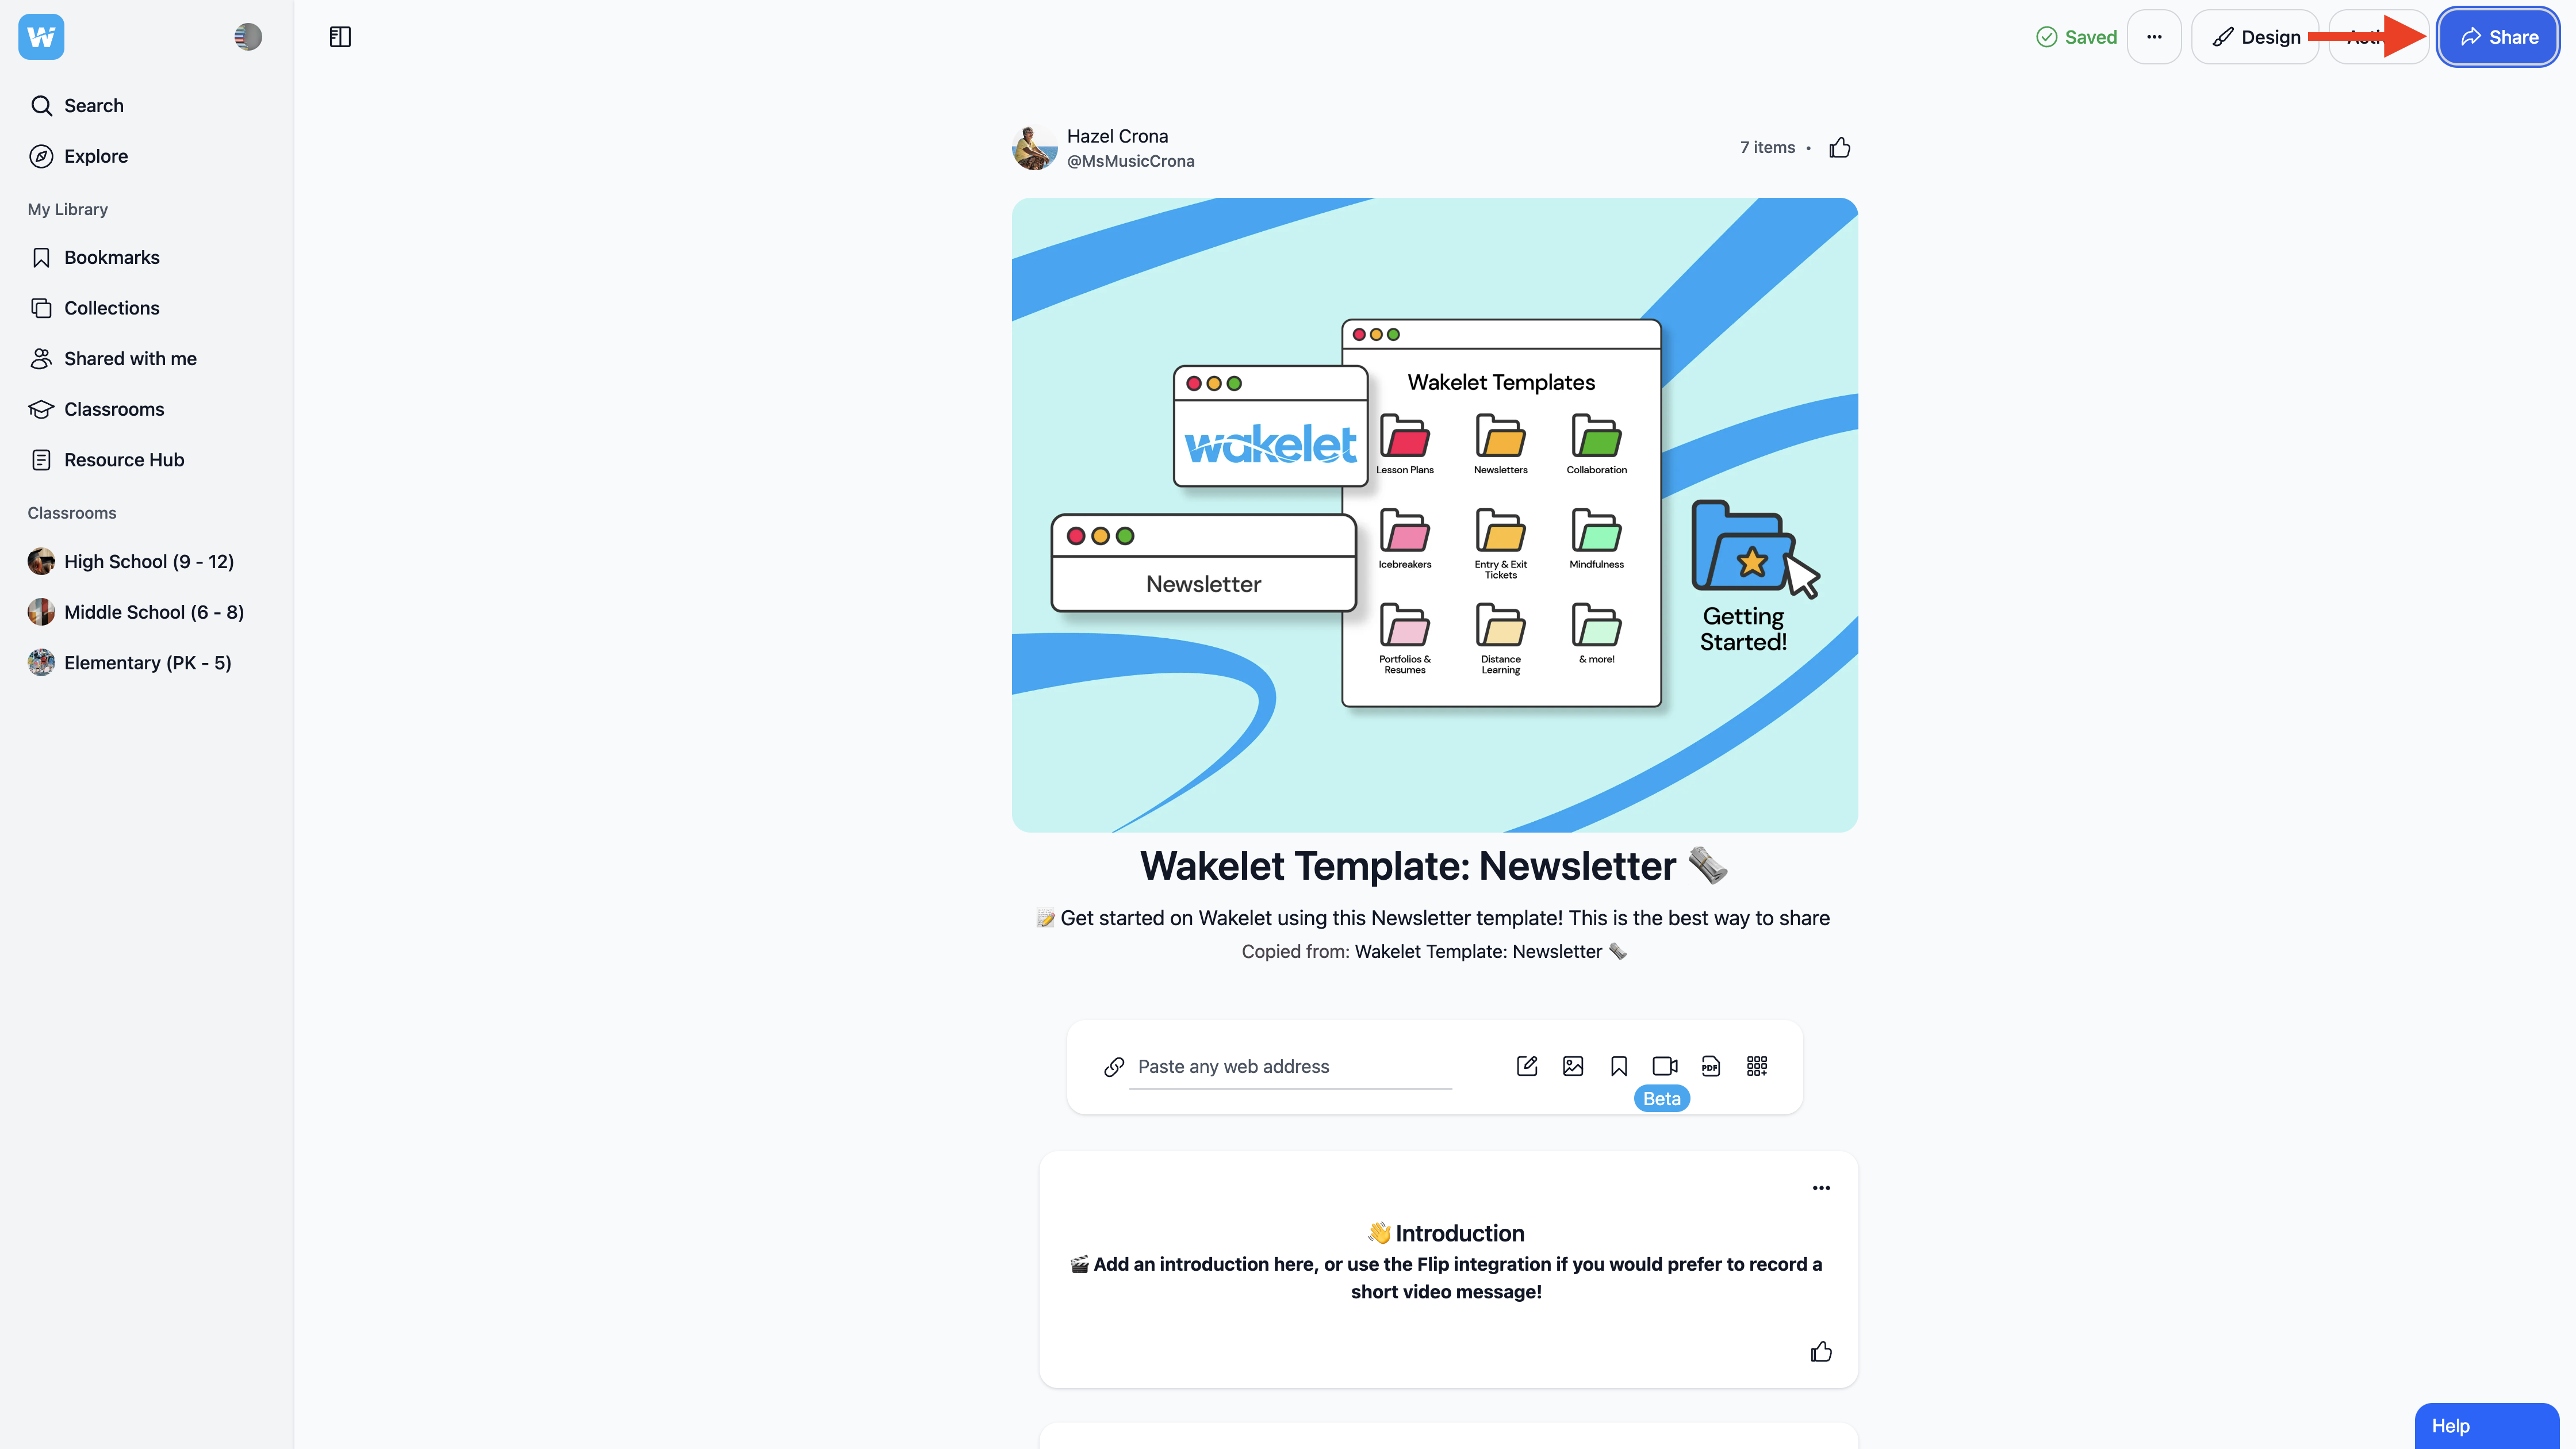
Step 1: Access the Share Button
- Once you've created or moved a collection to a classroom, locate the collection you want to share.
- In the upper-right corner of the collection, you'll find the 'Share' button. Give it a click to initiate the sharing process.
Step 2: Choose Access Permissions
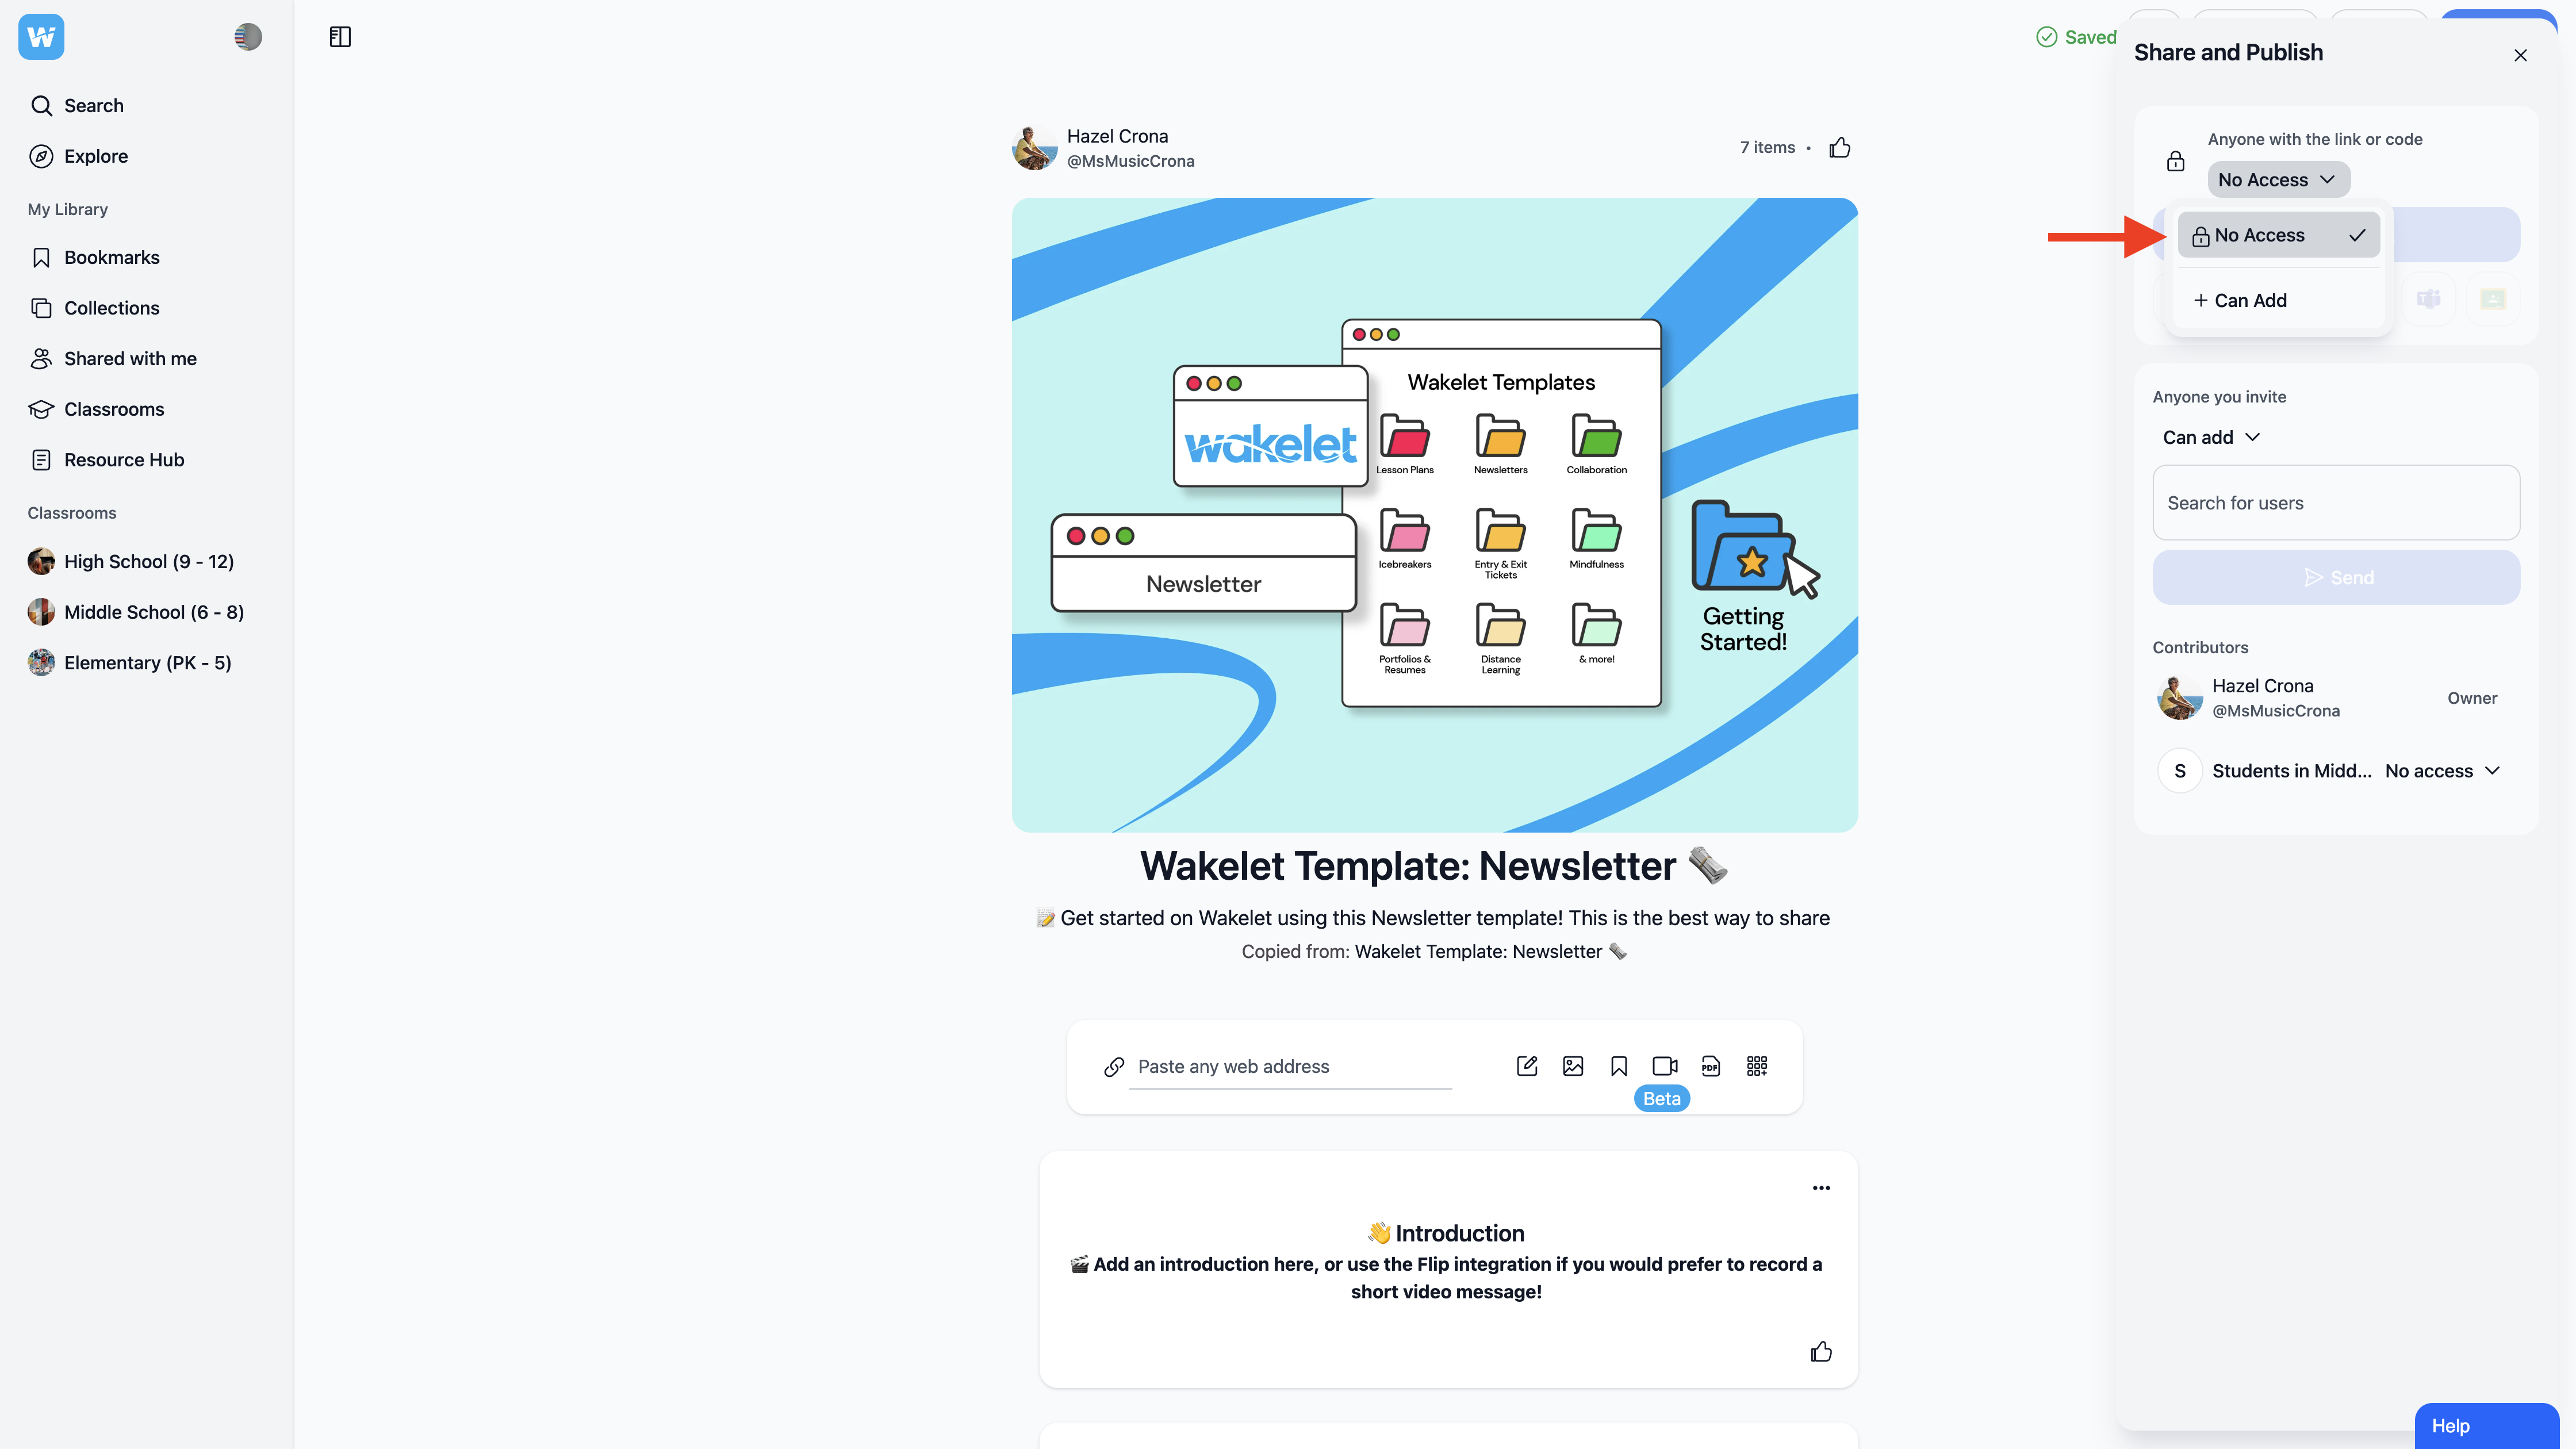
- Upon clicking 'Share', a dialog box will appear. Within this box, you'll see a dropdown menu labeled 'No access'. Click on the dropdown menu to unveil a list of access options.
- From the list, simply select 'Can add'. This permission level enables students to contribute to the collection.
- Now share the link with your students.
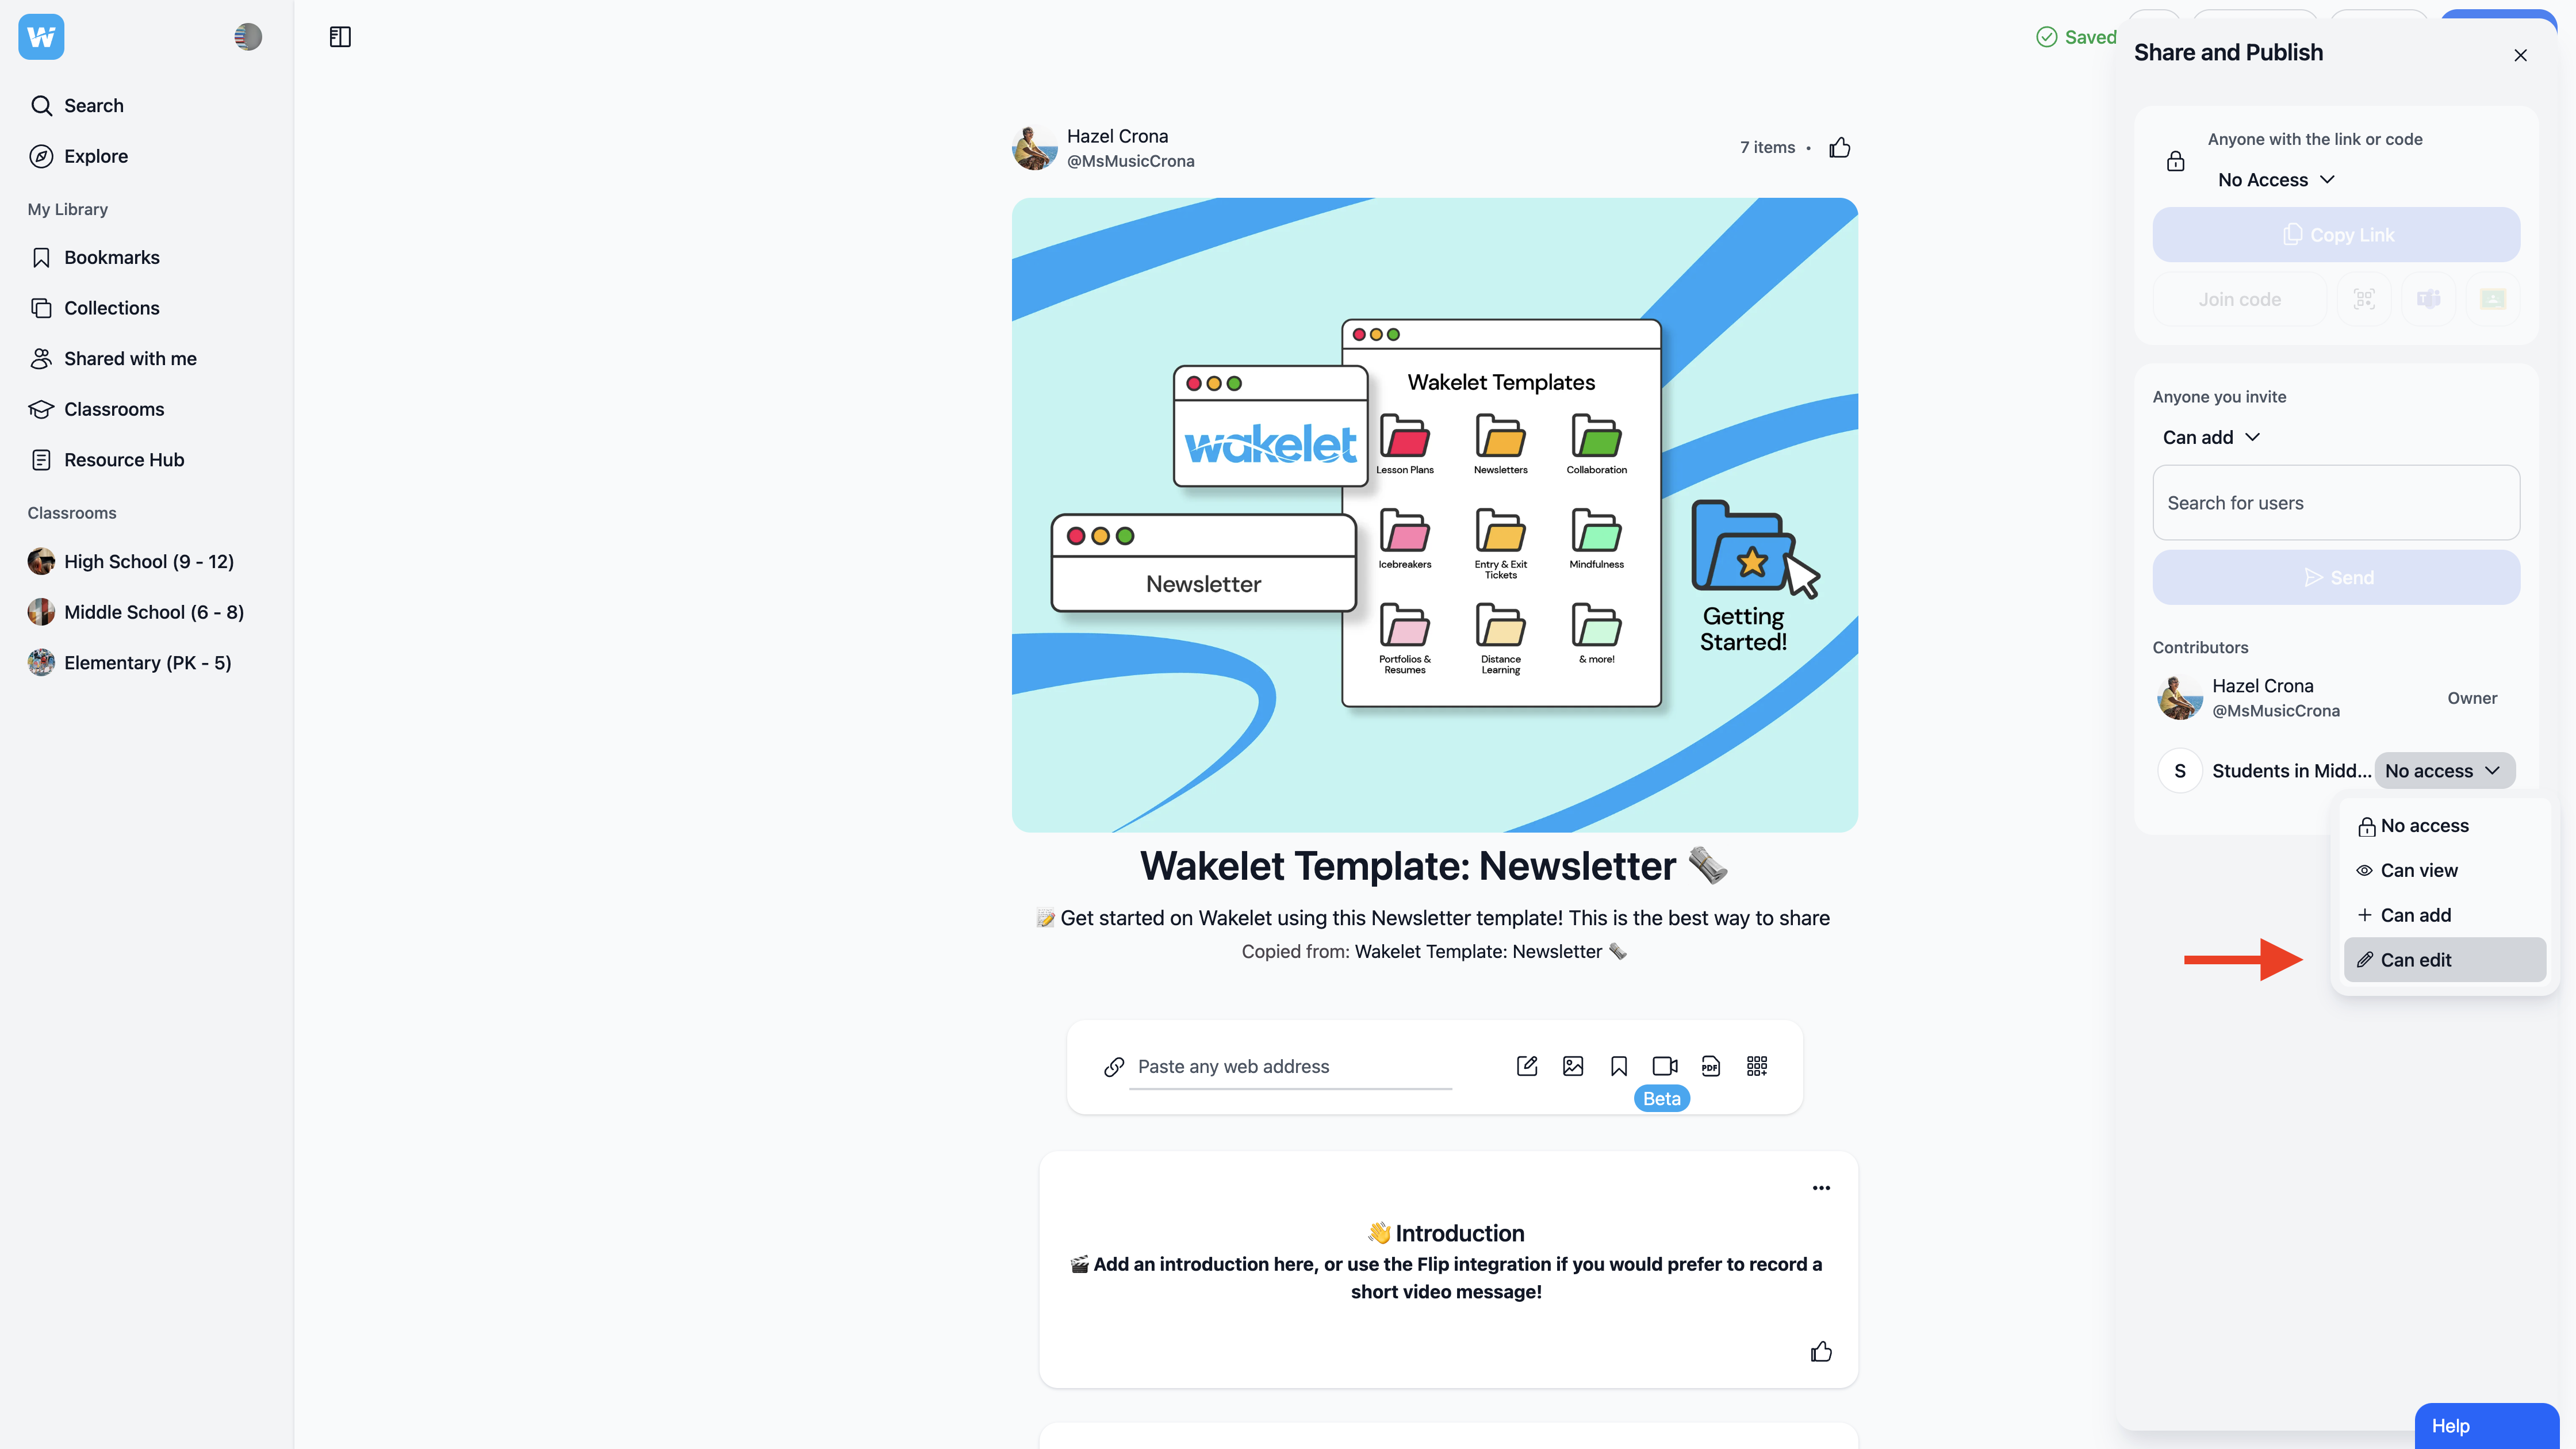
Step 3: Customize Permissions (Optional)
- Once you've selected 'Can add', you have the flexibility to further customize permissions for your students using the 'Contributors' section of the share dialog box.
- Click on the 'Can add' option within the contributors section. This will provide additional choices:
- Can view: This option allows students to view the collection without the ability to make changes.
- Can add: Students can add their own content to the collection, but they won't be able to edit existing items.
- Can edit: This highest permission level lets students not only add their content but also edit the entire collection, including items contributed by others.